Application guide
How to use a vacuum erection device
The sequence below summarises the logic of the Active3 instructions for use. It does not replace them — always read the instructions supplied with the device.
The 30-minute rule: the constriction ring must never stay on longer than this, for any reason. Remove the ring as soon as intercourse is over.
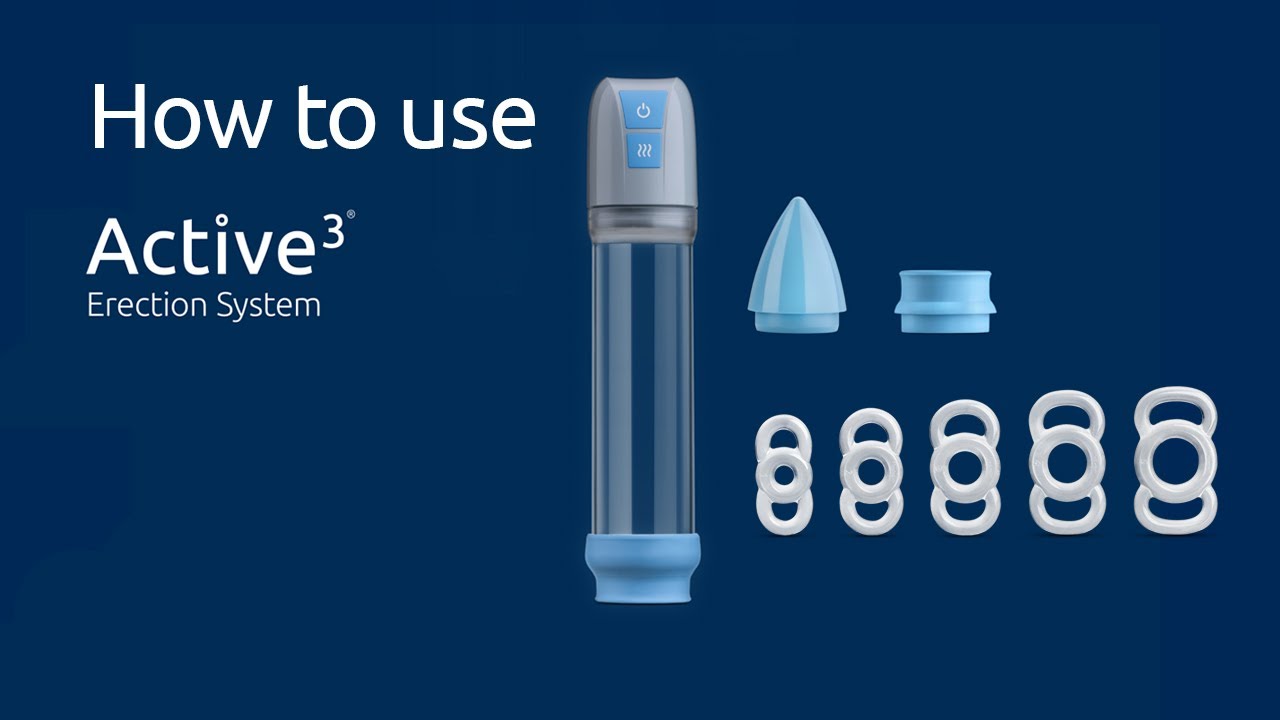 System parts
Six steps
In order
Preparation takes longer during the first attempts; after a few sessions the whole process takes only a few minutes.
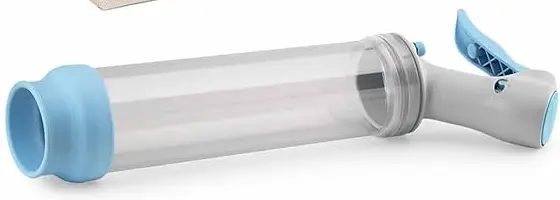
- 01
Preparation
Attach the pump head to the cylinder. Apply a thin layer of lubricant to the cylinder rim that touches the skin and to the penis. If necessary, trim pubic hair so it does not cause vacuum leaks.
- 02
Load the ring
Use the ring loader to fit a ring of the right size onto the end of the cylinder. Starting with the largest ring is recommended for your first attempt.
- 03
Build the vacuum gradually
Seat the cylinder firmly against the groin and press the power button. Negative pressure draws blood into the corpus cavernosum. If you feel any discomfort, do not wait: press the release button.
- 04
Slide the ring
Once sufficient rigidity is reached, slide the ring to the base of the penis. By slowing the return of blood, the ring maintains the erection after the cylinder is removed.
- 05
Remove the cylinder
Let air in with the release button and remove the cylinder. The erection is maintained by the ring; intercourse is possible at this stage.
- 06
Remove the ring — 30 minutes maximum
Under no circumstances should the ring be worn for longer than 30 minutes. Once removed, blood circulation returns to normal and the penis returns to its usual state.
Manual drawings
Step by step in drawings
The illustrations below are taken from the instructions for use supplied with the device; the descriptions are based on the manual’s own text. The sequence covers the whole process, from opening the box to removing the ring — read it as the visual counterpart of the six steps above.
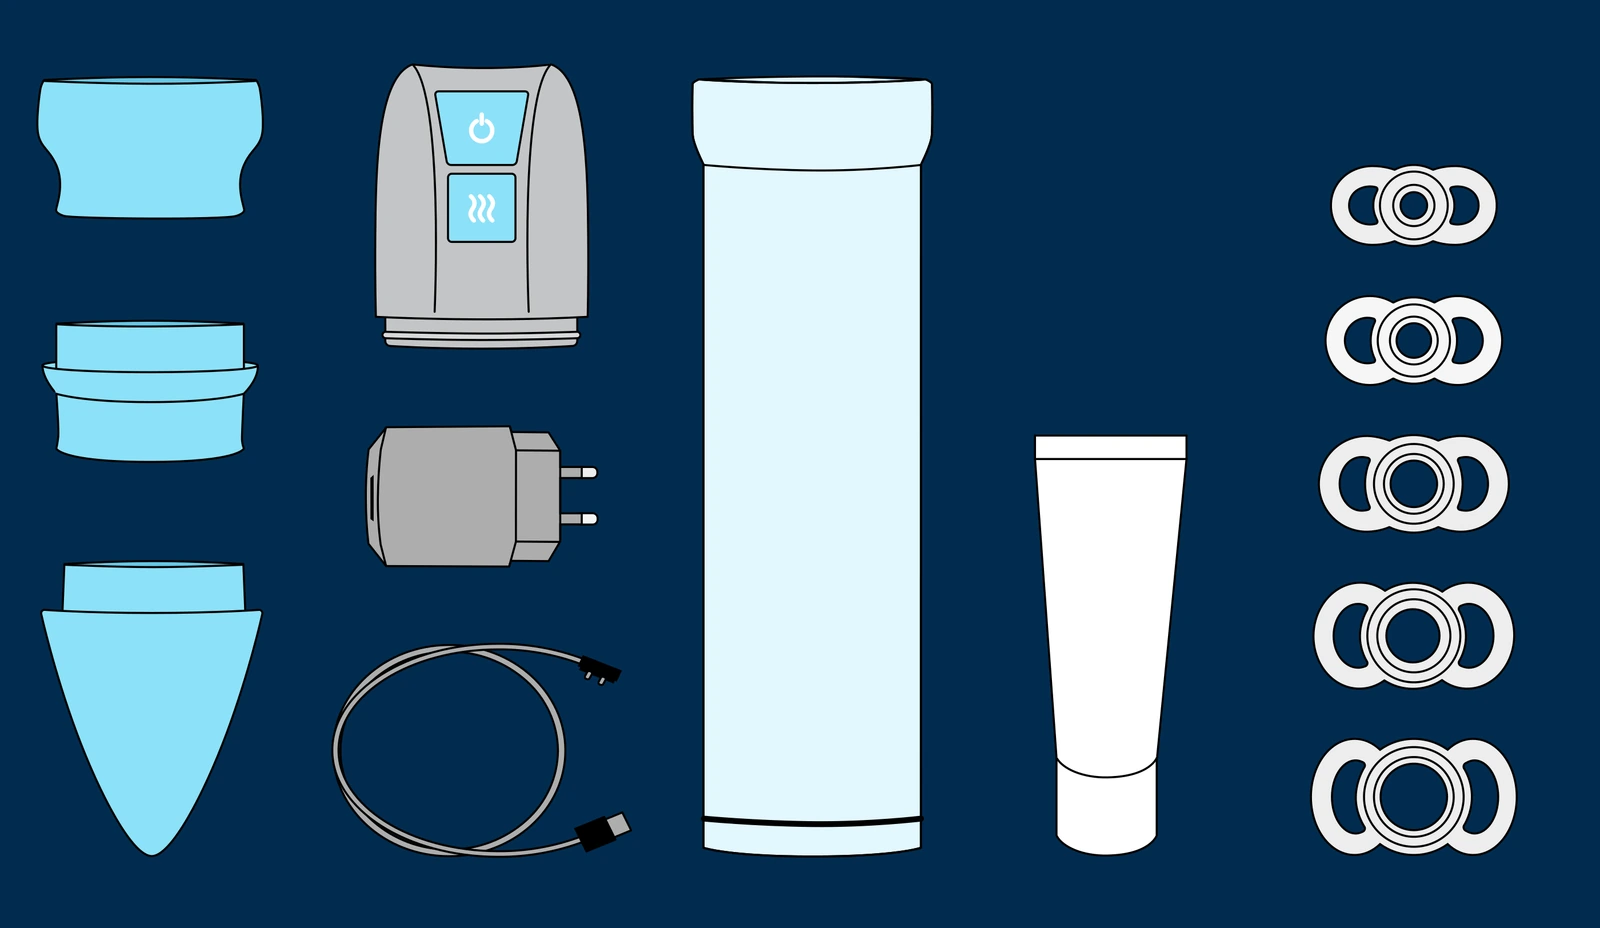 Illustration · kit parts
Part 1 · Charging
Before first use
The pump head comes out of the box partially charged. Charging it fully before first use ensures the vacuum builds as expected on the first attempt.
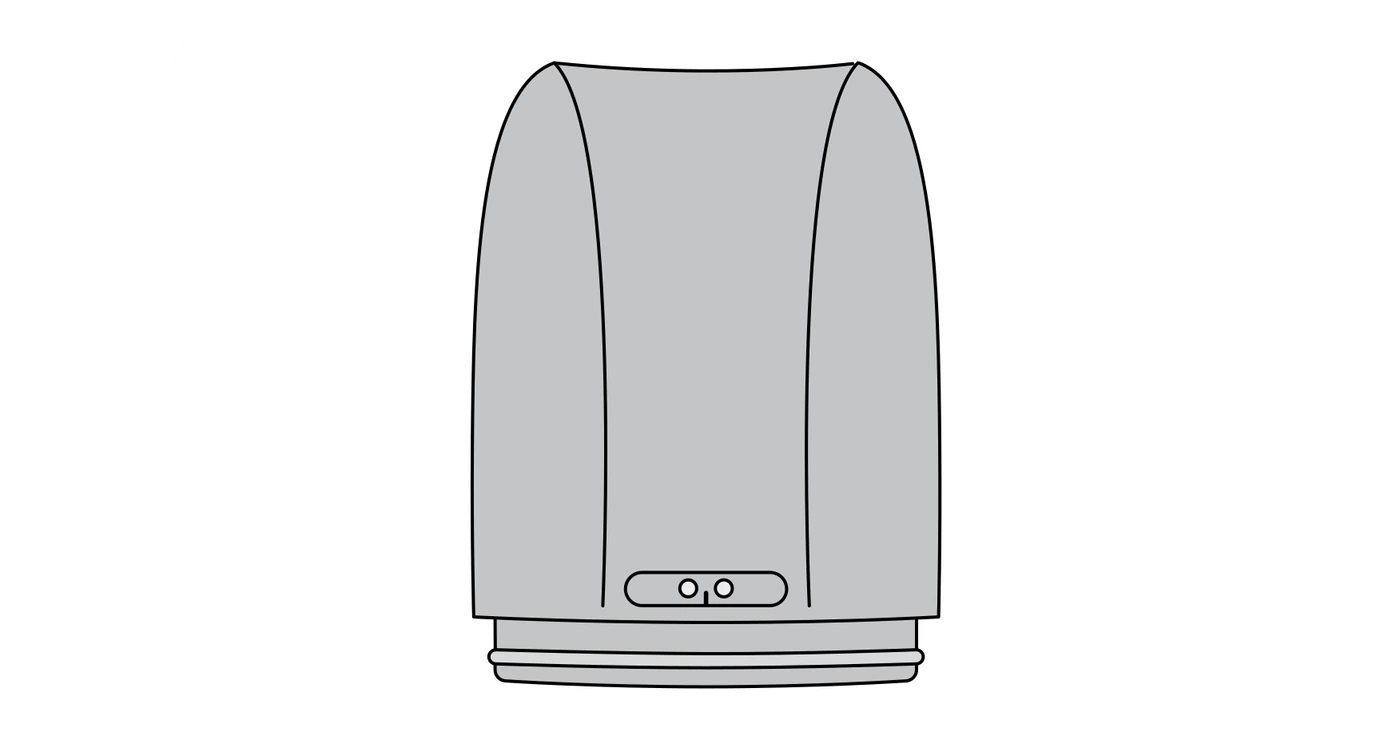 01
Pick up the pump head
The motor, buttons and rechargeable battery are inside this part. Hold it with the buttons facing you and the charging contacts at the bottom.
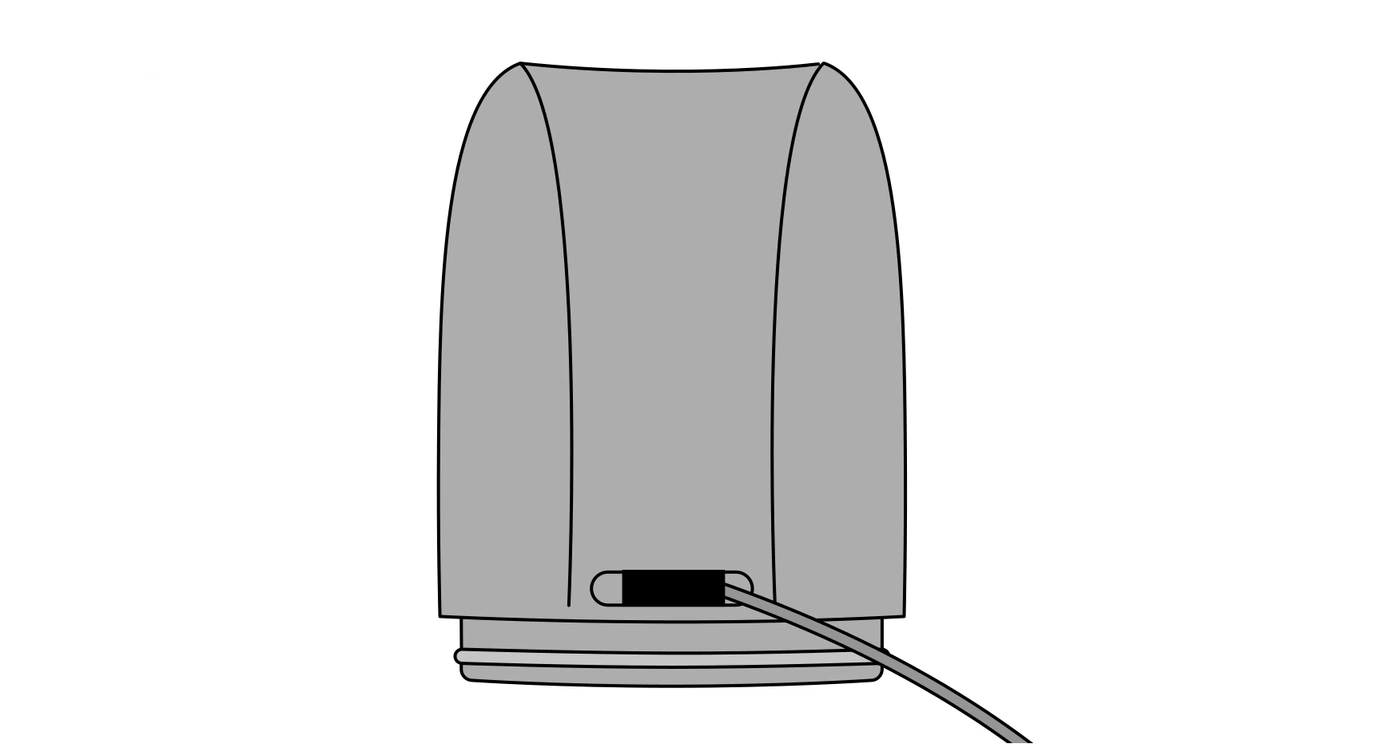 02
Connect the charging cable
Charge the head for at least 2 hours before first use and after a long break. The motor does not run while the cable is connected; do not use the device while it is charging.
Button indicator
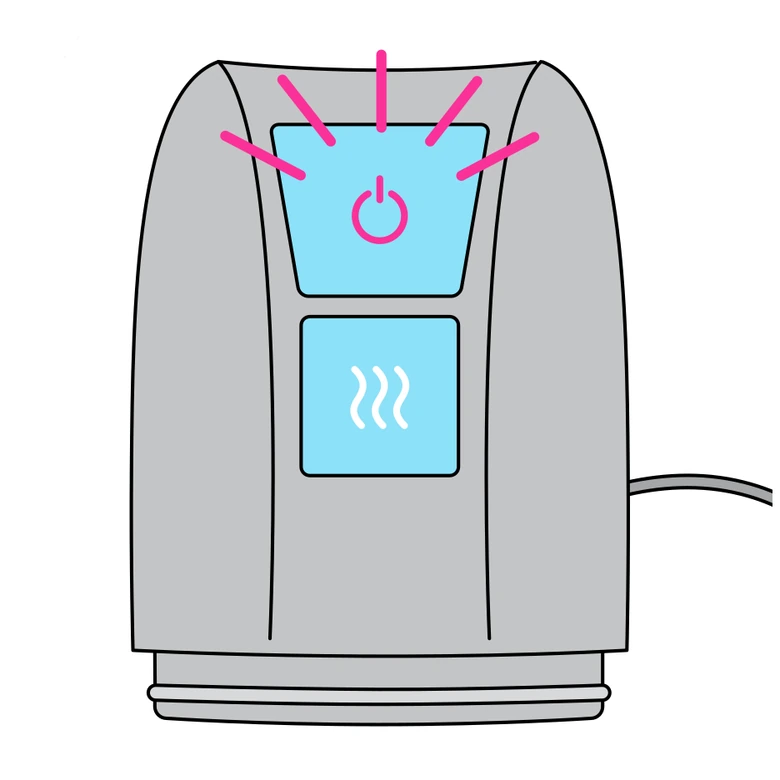
Flashing red
The battery is almost empty. Connect the device to the charger.
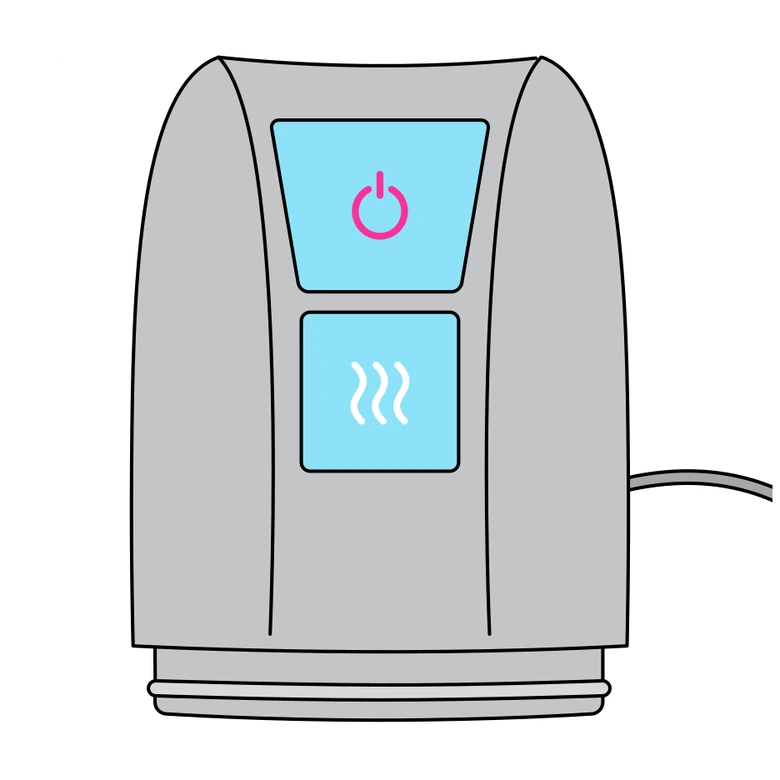
Intermittent red
Charging in progress. Wait at least 2 hours.
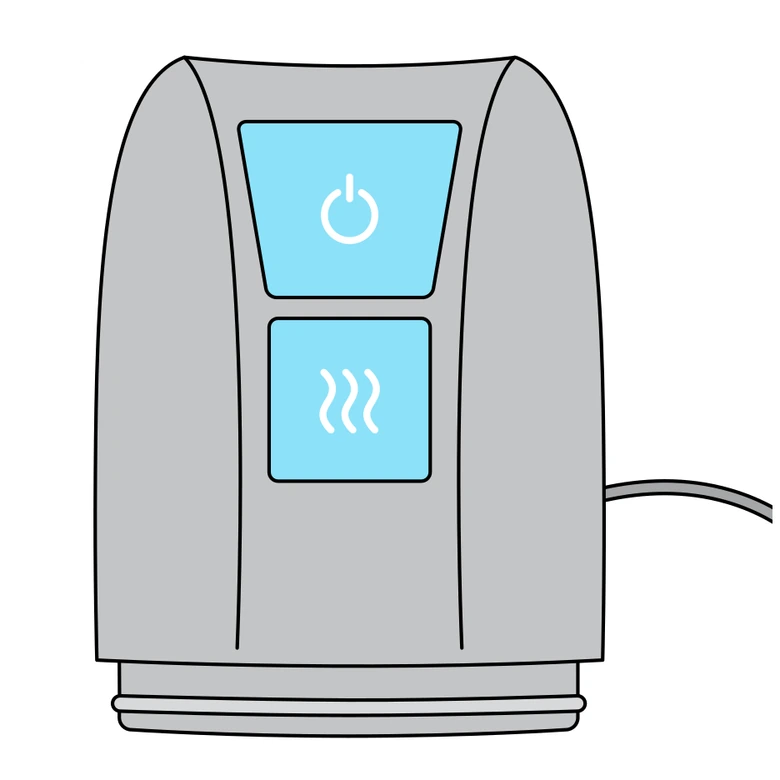
Solid white
Battery full. The device is ready to use.
Part 2 · Assembly
Prepare the device on a table
Assembly is completed on the table before the device touches the body. Once you have learned these six steps, preparation takes less than a minute.
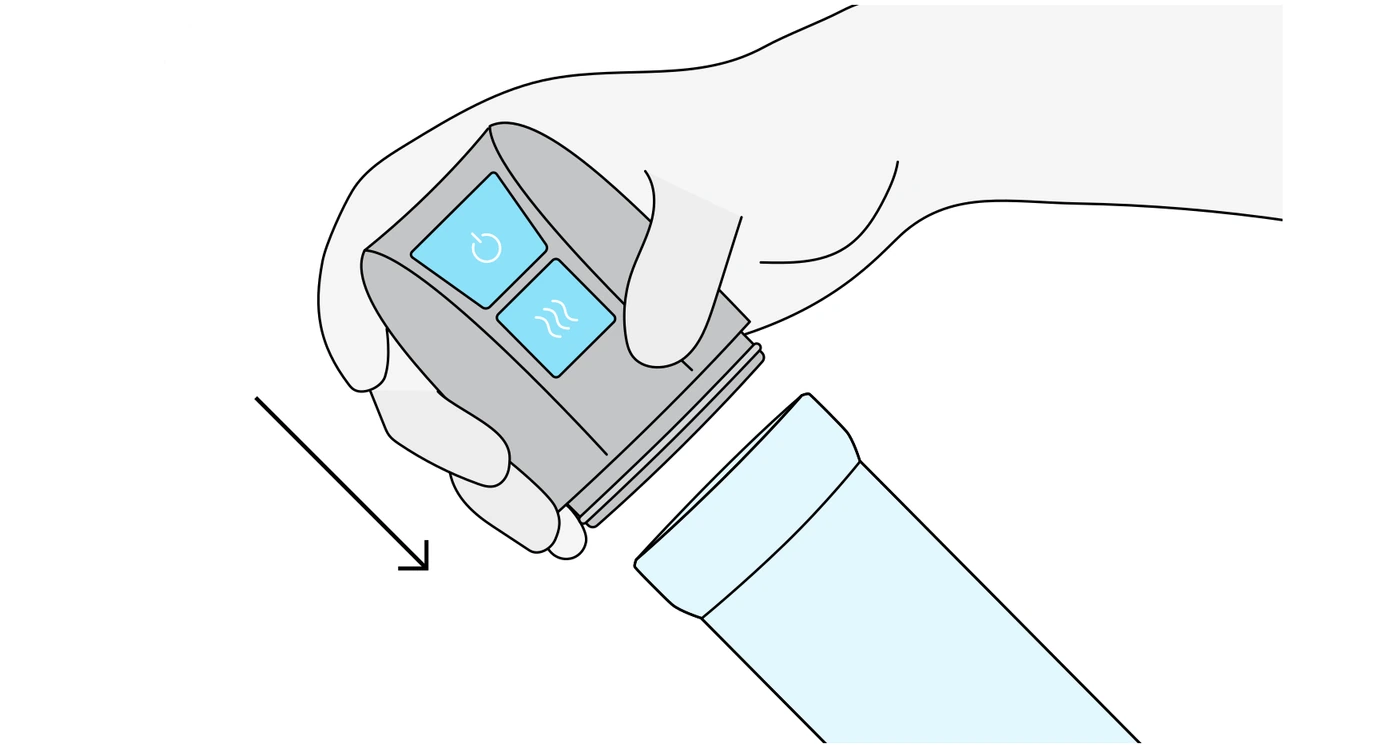 01
Press the pump head onto the cylinder
Seat the head on the wide opening of the cylinder. The connection must be airtight; a loose fit prevents the vacuum from building.
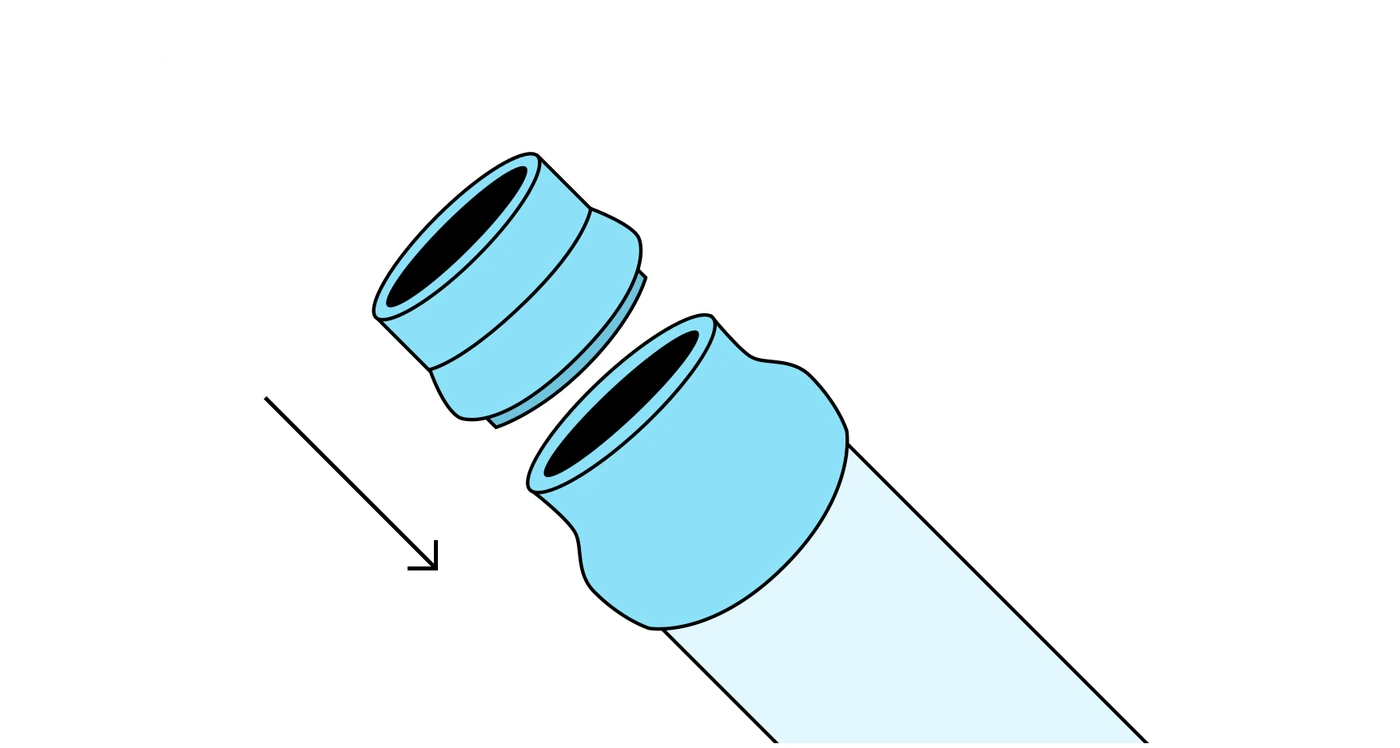 02
Fit the sleeves
On the other end of the cylinder, fit the large sleeve first, then the small sleeve over it. The sleeves have only one job: to carry the ring.
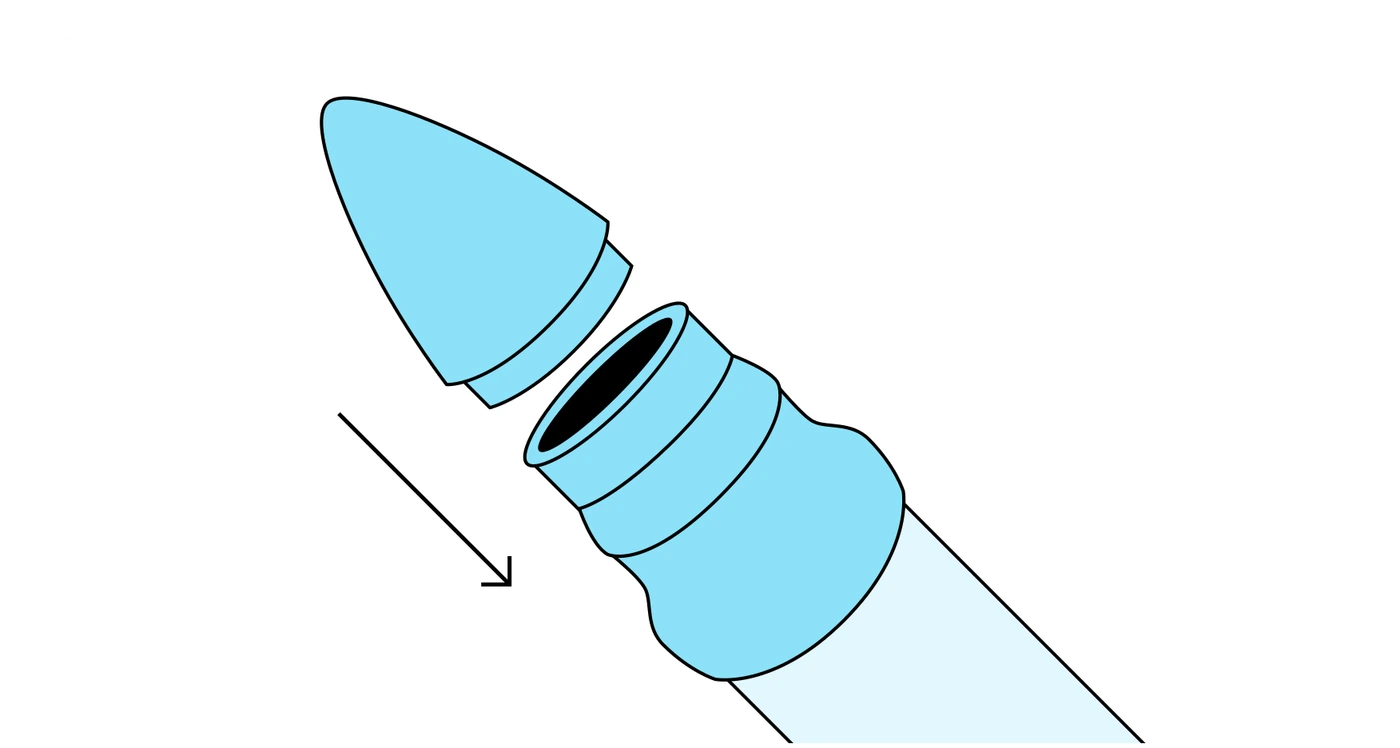 03
Insert the cone
Seat the cone inside the small sleeve. The cone lets you slide the ring onto the sleeve without forcing it; using it is optional.
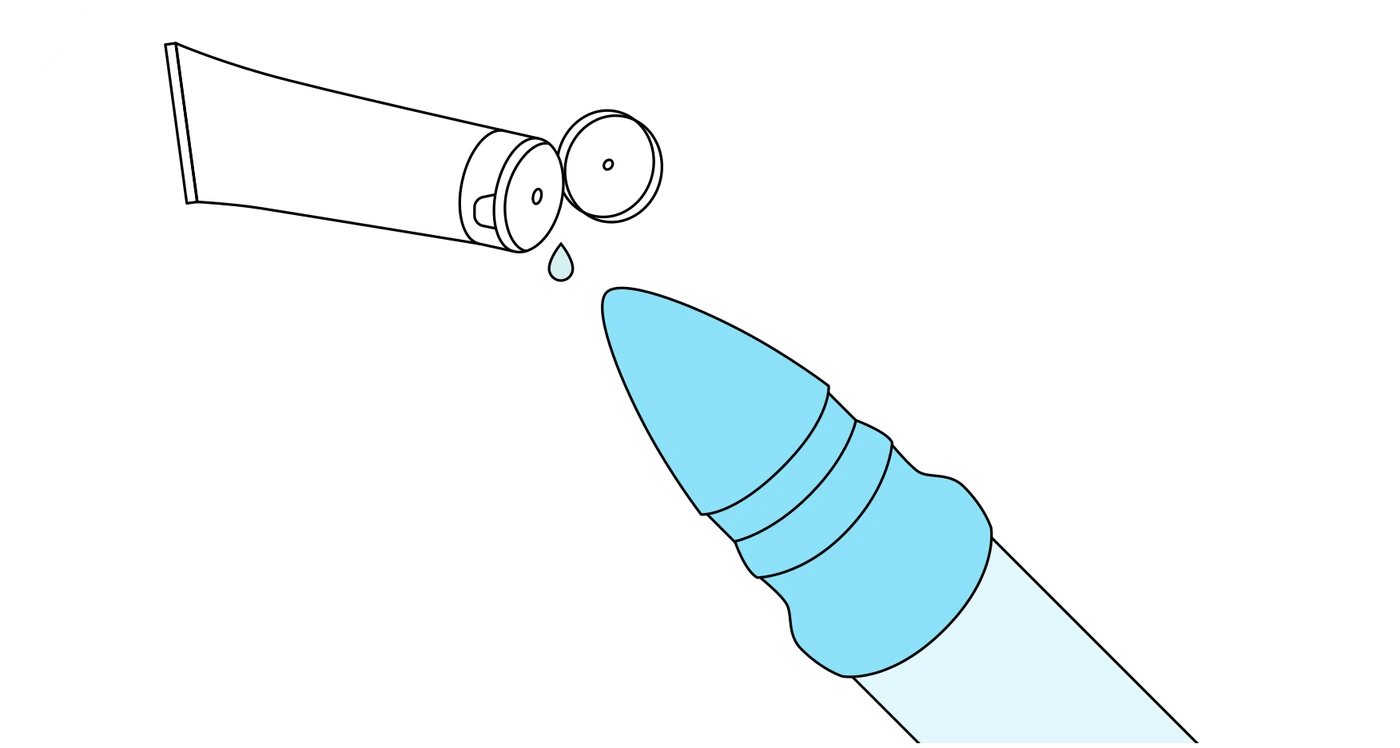 04
Apply lubricant to the cone
A thin layer of gel on the tip of the cone is enough. On a dry surface the ring catches and will not seat properly.
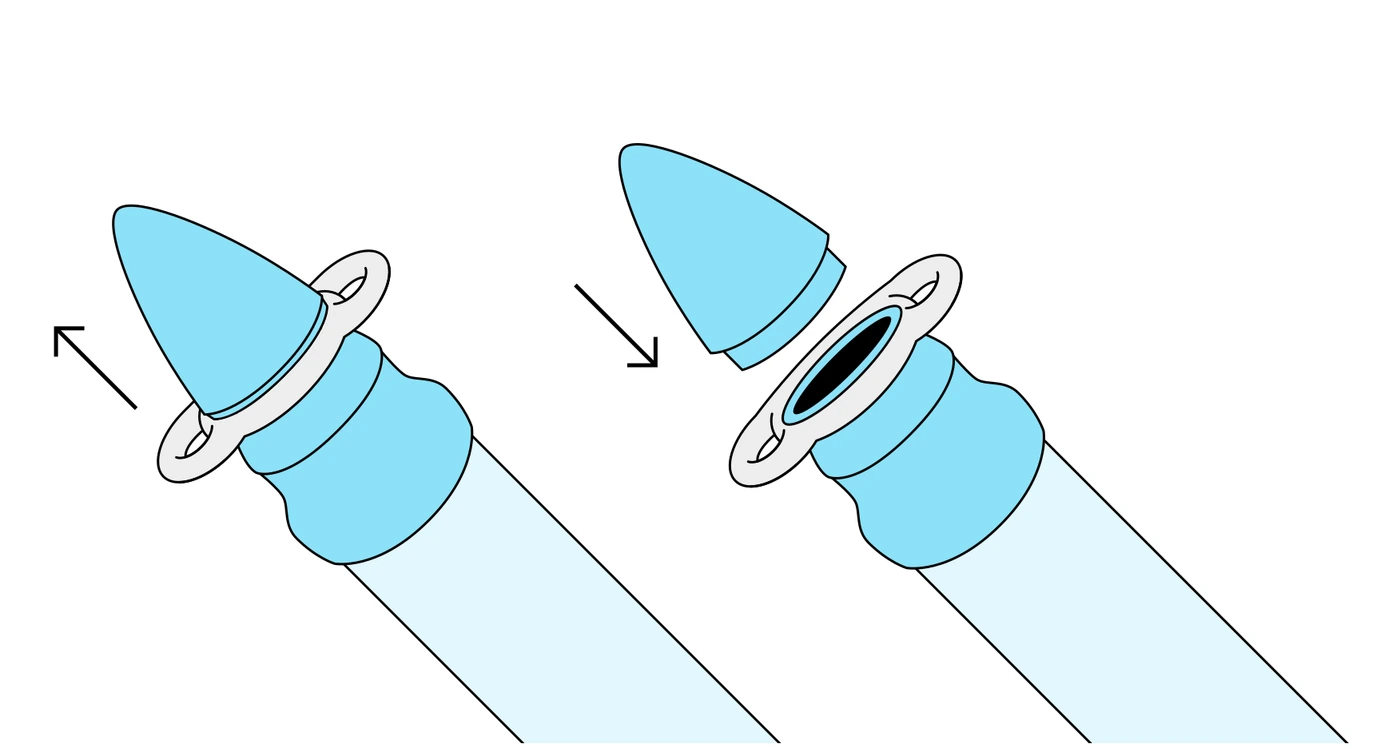 05
Slide the ring onto the sleeve
Push the ring from the tip of the cone onto the sleeve, then remove the cone. Always start with the largest ring on your first attempt.
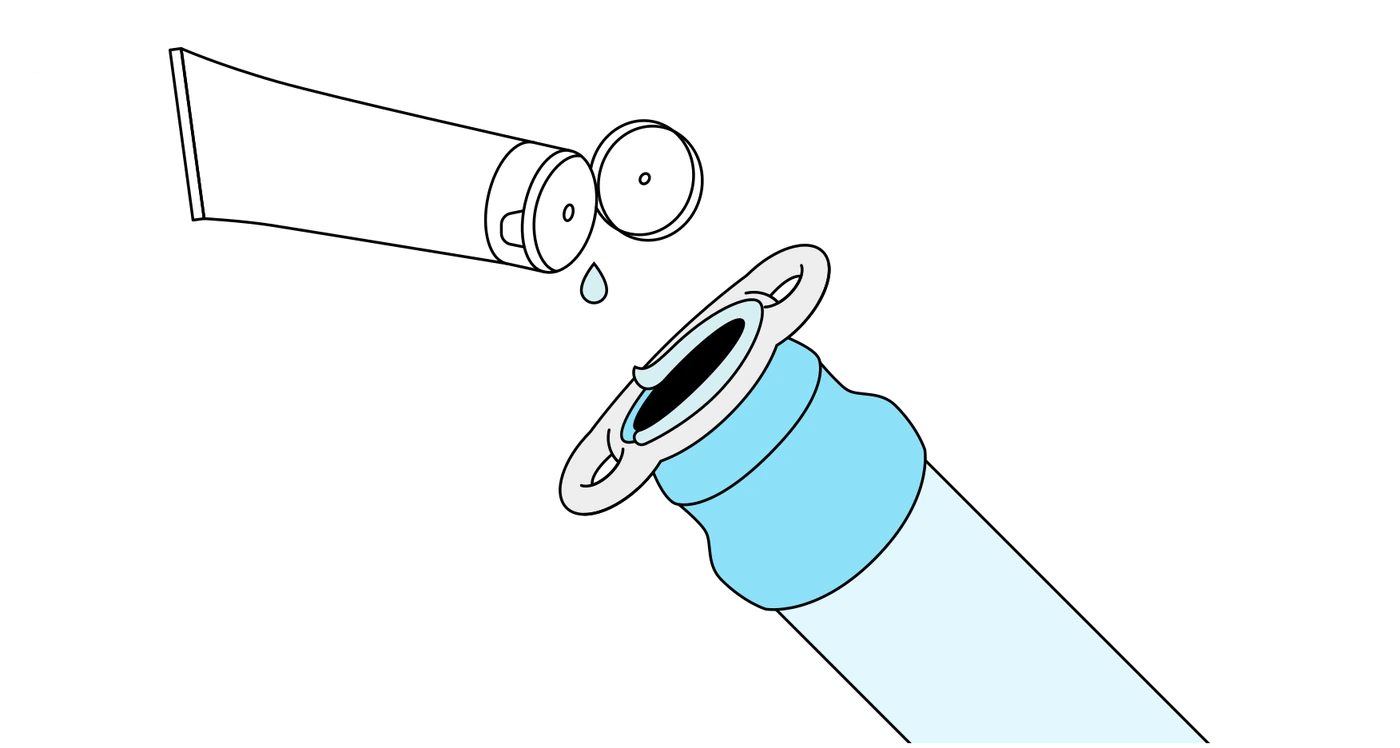 06
Apply gel to the sleeve edge
If the edge that touches the skin is not lubricated, the vacuum will leak. This is the number one cause of leaks.
Part 3 · Application
From vacuum to ring
The order of use follows the manual. Sliding the ring to the base of the penis is the most critical step in the sequence: if the ring does not seat properly, the erection will not be maintained when the cylinder is removed.
Count the time the ring stays on from the last step: no more than 30 minutes. Do not fall asleep with the ring on.
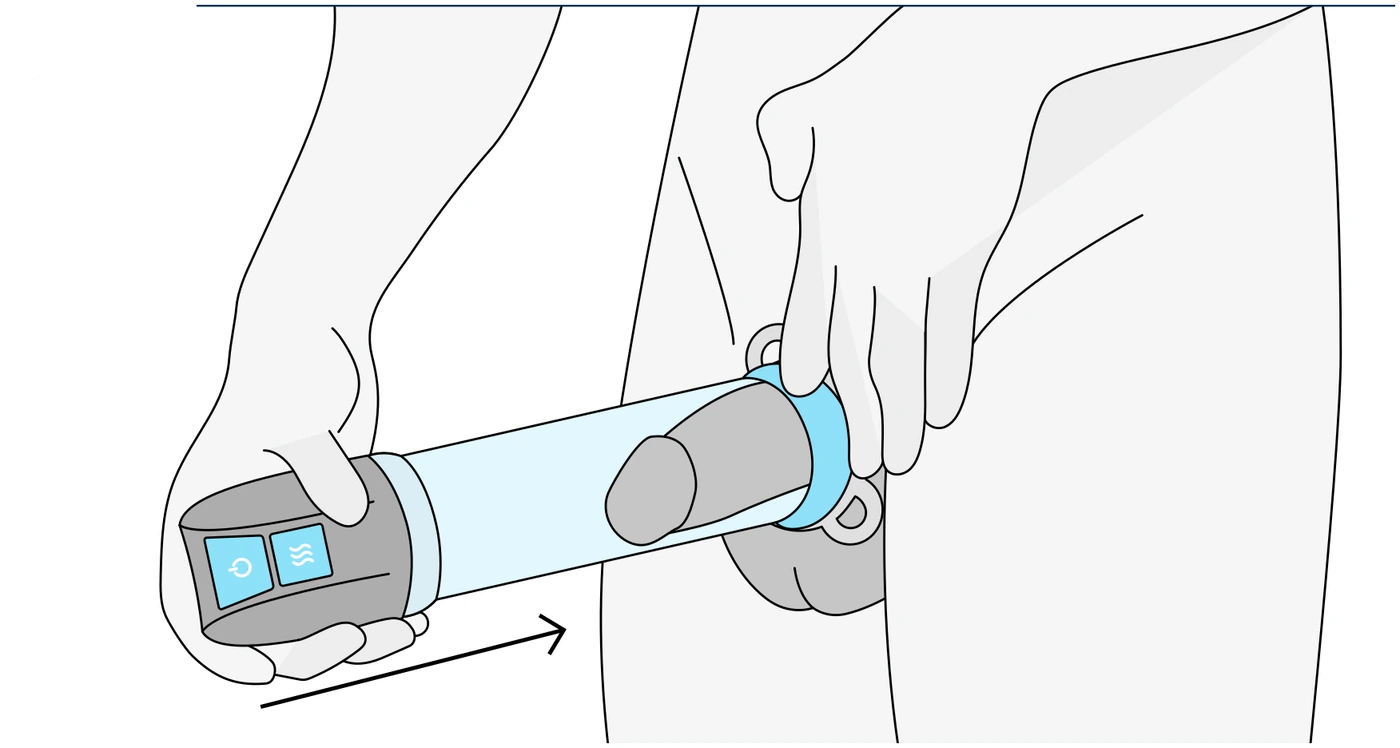 01
Position the cylinder
Pass the penis through the sleeve into the cylinder and press the device firmly against your body. The cylinder rim should grip the skin all the way around; trim the hair at the base of the penis if necessary.
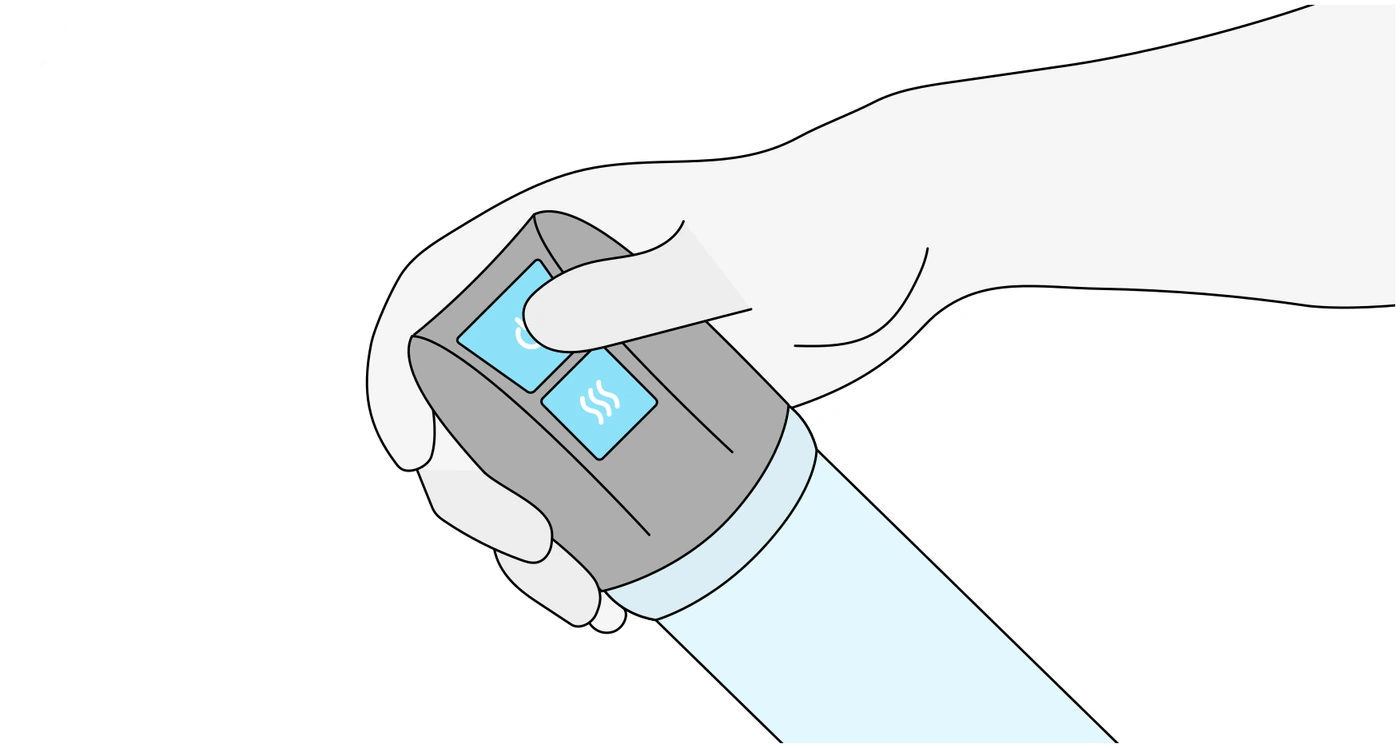 02
Hold the button down
As long as you hold the button, the motor draws air out of the cylinder; when you release it, it stops. The vacuum draws blood into the erectile tissue. If you feel any discomfort, release it immediately.
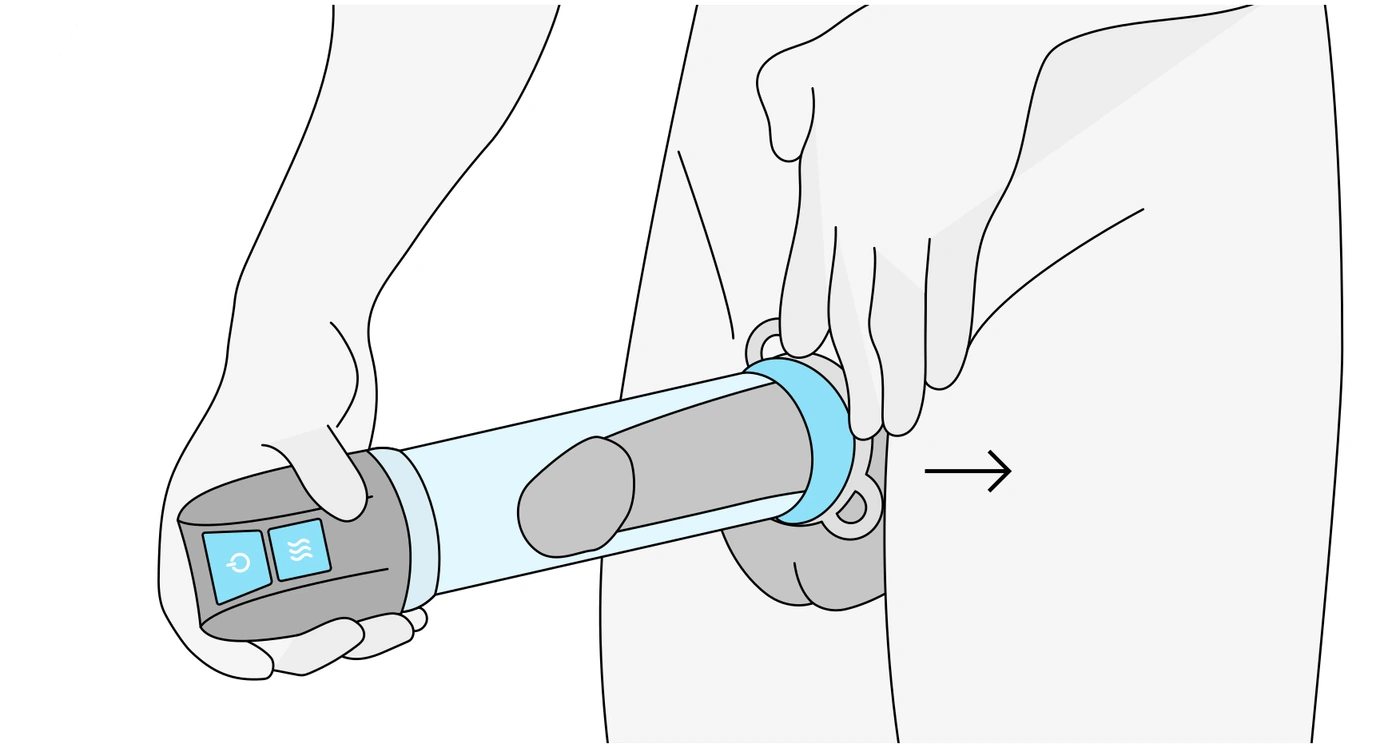 03
Slide the ring to the base of the penis
When you see sufficient rigidity inside the cylinder, transfer the ring from the sleeve onto the penis and, in one quick movement, push it as close to the base as possible.
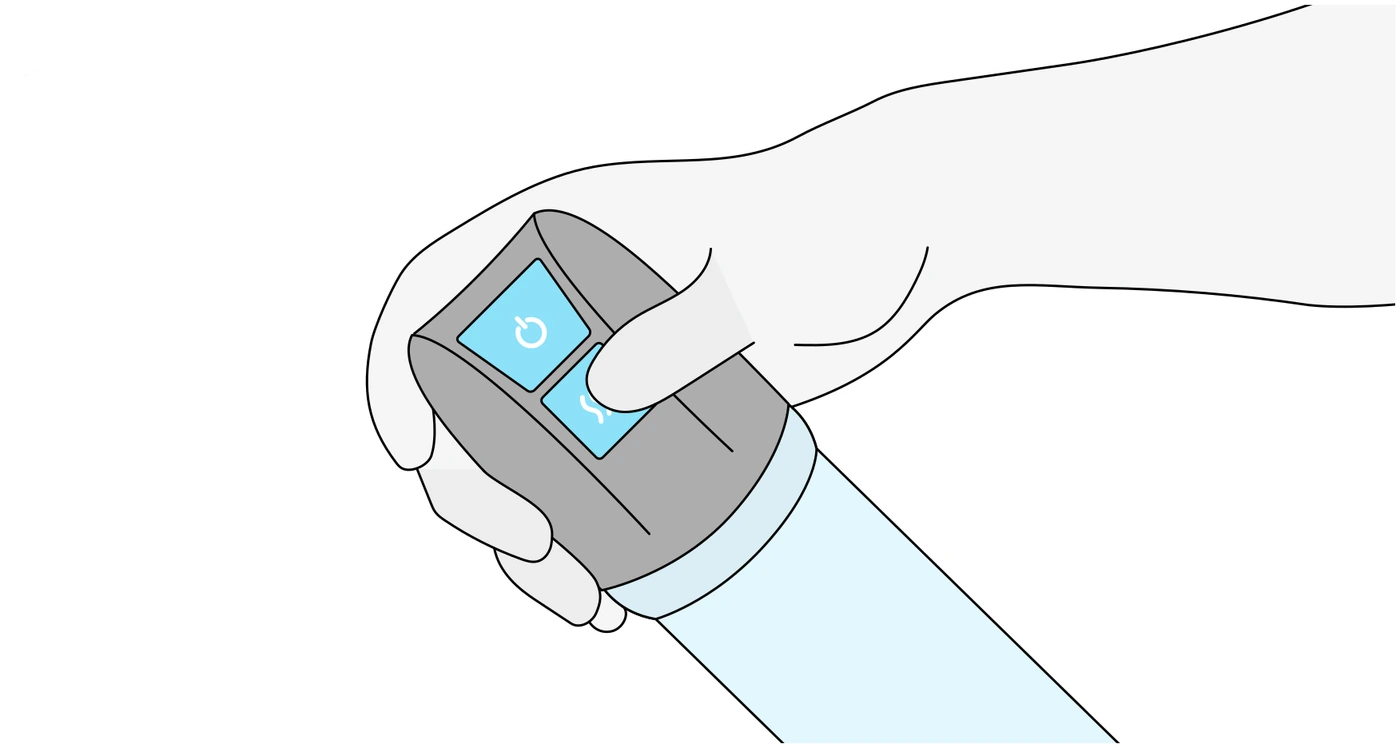 04
Remove the cylinder
Press the button to let air into the cylinder; the device comes away easily. The erection is maintained by the ring at the base of the penis.
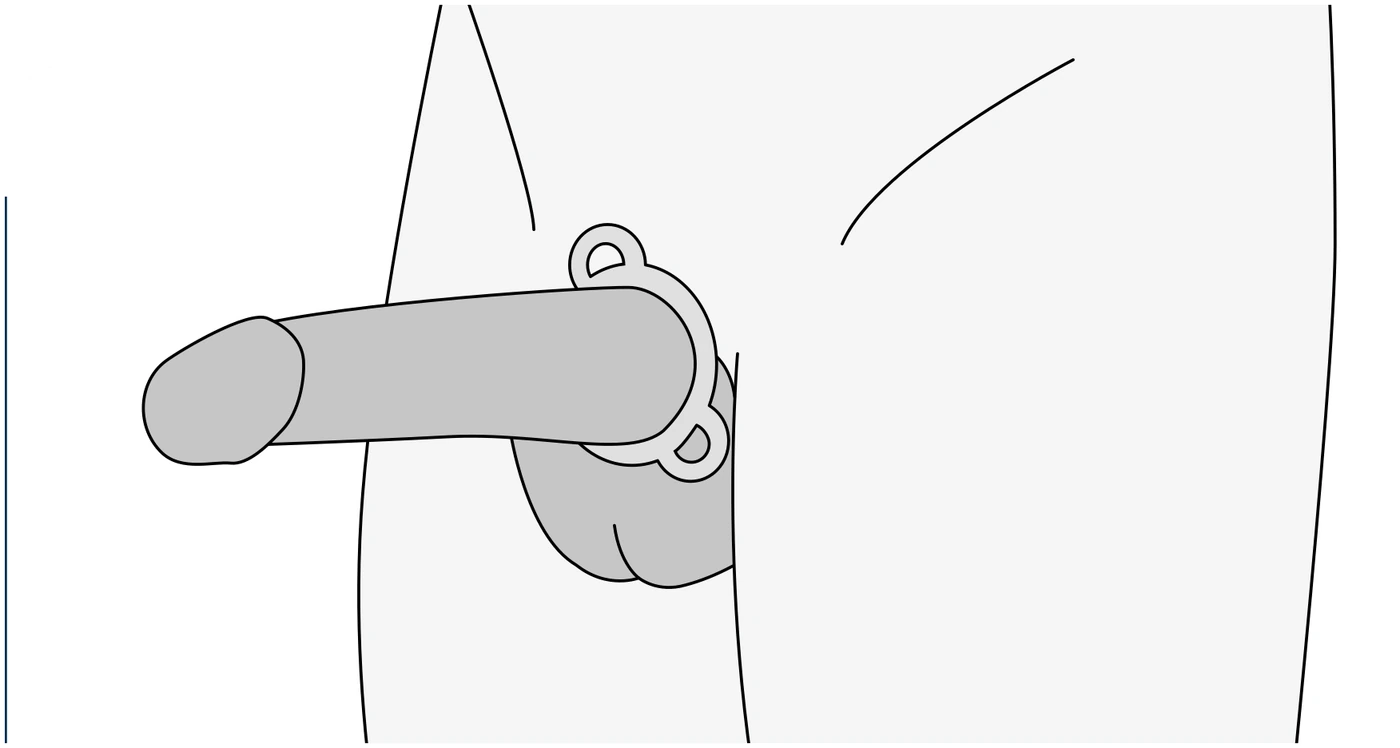 05
The ring maintains the erection
Seated at the base, the ring slows the return of blood and maintains rigidity after the cylinder is removed. Intercourse is possible at this stage.
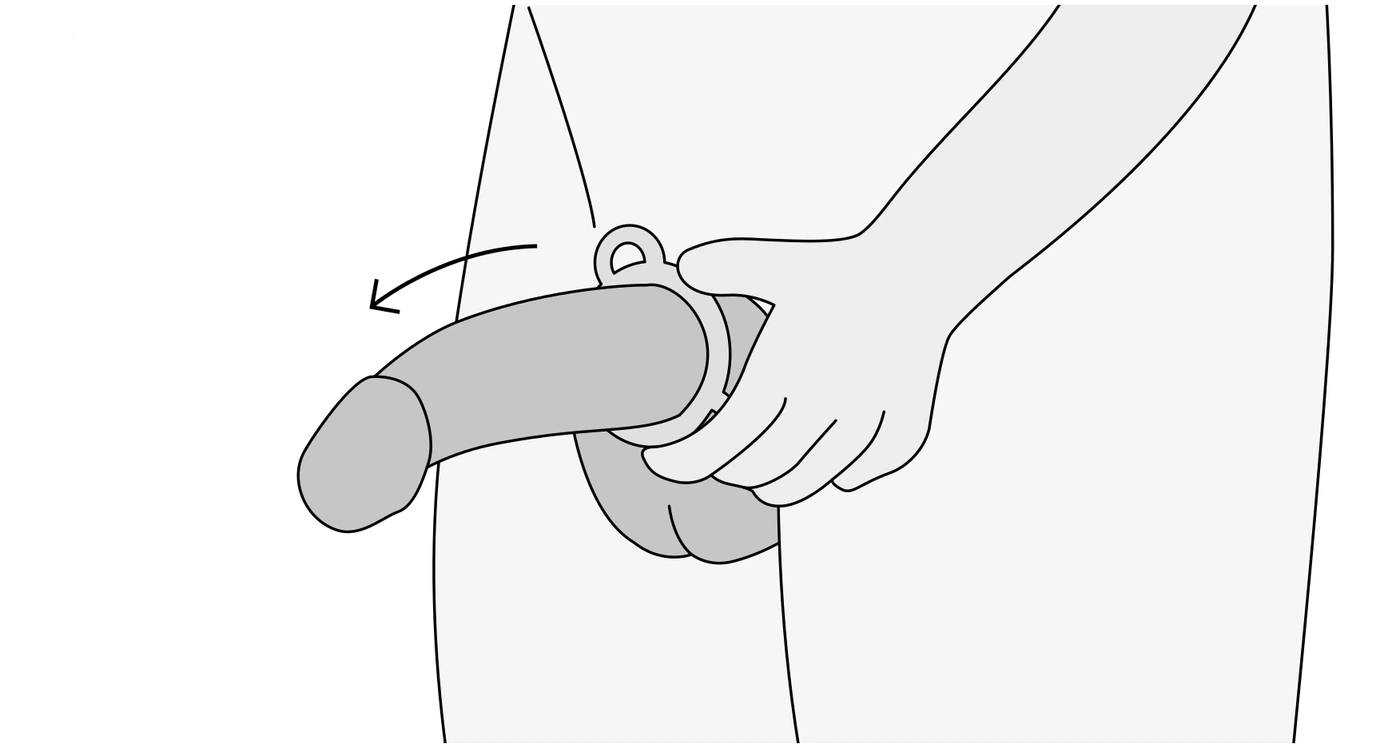 06
Remove the ring
After intercourse, pull briefly on the ring tabs, wait until the blood has flowed back into the body, then remove the ring. The ring must never, for any reason, be worn for longer than 30 minutes.
Ring and sleeve
How do you find the right size?
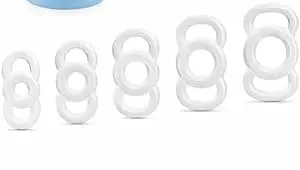
The part that actually determines how long the erection lasts is the constriction ring. The right size is found by trial, not calculation, which is why the kit includes five sizes. The sequence below is the same method described in the instructions for use.
- 01
Start with the largest ring
Starting with 21 mm on your first attempt is the safest option. If the ring is too large, the penis will not stay rigid for long; move down one size and work through the sizes until you find the one that fits.
- 02
Pain means the size is too small
A ring that is too tight is painful. Pain is not something to tolerate: stop, remove the ring and try again with the next size up.
- 03
Two sleeves mean two different widths
The small sleeve is slightly narrower and the large sleeve slightly wider. If the small sleeve feels too narrow, use only the large one. If both sleeves feel too narrow, you can slide the ring directly onto the cylinder.
- 04
The sleeves fit every ring size
The ring size you use does not change your choice of sleeve; both sleeves work with all five rings. The cone is optional too — you can also slide the ring onto the sleeve by hand.
- 05
Rings are wear parts
Use only the original rings supplied with the kit and keep track of their expiry dates. Rings need replacing from time to time; spares are available from your retailer.
Common mistakes
Why do first attempts fail?
Not using lubricant
The number one cause of vacuum leaks. A thin layer on the rim of the cylinder that touches the skin is enough.
Building vacuum all at once
Sudden, high pressure causes bruising and pain. Build it gradually and pause in between.
Starting with the smallest ring
The right order is the reverse: start with the largest and go smaller if needed. A tight ring causes pain.
Not seating the cylinder firmly against the body
If the rim of the cylinder does not seal against the skin all the way round, no pressure difference builds up. Long pubic hair can also cause leaks.
Not keeping track of time
The ring must not stay on longer than 30 minutes. Users with reduced sensation should use a timer.
Care
Cleaning, charging and storage
Two rules determine the life of the device: the pump head never comes into contact with water, and it goes into storage fully charged. All other parts are cleaned with ordinary hand soap.
Cleaning
- Remove the pump head from the cylinder before cleaning.
- Wipe the pump head only on the outside with a damp cloth. Never hold it under running water — liquid getting inside will damage the head.
- Do not use detergents or solvents.
- The cylinder, sleeves, cone and rings are easily cleaned with lukewarm water and a mild soap.
- Clean and dry the parts after every use.
Charging
- Do not charge the device during use; the motor does not run while the cable is connected.
- Charge for at least 2 hours before first use and after long periods without use.
- Use only the cable and USB adapter supplied with the kit for charging.
- The battery is designed for 500 charge cycles.
Storage
- After drying, store the parts in the bag supplied with the kit; it keeps out both dust and curious eyes.
- Keep the device out of the reach of children.
- If the device will not be used for a long time, store the pump head fully charged.
- Storage and transport range: −25 °C to +70 °C, maximum 90% relative humidity.
Troubleshooting
What to do if…
Most problems are not device faults but application settings. The table below follows the order of solutions in the instructions for use.
| Problem | What to do |
|---|---|
| No erection forms | Check the seal, the position and the ring size; build the vacuum gradually. |
| No vacuum builds up | Test the device on your thigh or abdomen; make sure the air outlets are open and the connection is airtight. |
| Rigidity is not sufficient | Increase the vacuum level gradually or switch to the next smaller ring size. |
| Rigidity is not maintained | Try the next smaller ring; review the ring placement described in the instructions for use. |
| The ring is too tight | Stop the application and switch to the next larger size. Pain is not to be tolerated. |
| Erection weakens after the ring is applied | Re-apply the vacuum using the ring tabs, as described in the instructions. |
| Difficult to withdraw the penis | Release the air completely; use a larger ring loader or try without a loader. |
| Pump performance has dropped | Check the charge level, the assembly and that the air outlets are not blocked. |
| The device does not work | Do not open or try to repair it yourself; contact the service. |
For the clinical background of the method, see the article on vacuum erection therapy; for all questions and answers, see the frequently asked questions page.
Info & order
Have a question about using the device?
Fill in the form and we will get back to you about current pricing, delivery and usage. We ship to Türkiye and all Arab countries in a neutral box that does not reveal its contents.
Open the request form